With only a few short weeks before Christmas, a quick and easy gift is a blessing to find. Need a little something for your child's teacher, a bus driver, hairdresser or favorite aunt?
Choose a colorful mug and add a matching rug to go with it!

What is a "mug rug?" It's a small placemat, around 11 1/2" square, to use for a mug and a small snack. You can make in holiday prints with another holiday background, such as Valentine's Day or Easter or even a print that will go with your decor.
Let's start!
You'll need four-5" squares
Two strips of 3 1/2" by width of fabric (WOF) of white-on-white (WOW) print
Two strips of 1 1/2" of a solid fabric WOF
13" square of cotton batting
14" square of backing fabric
About 48" of 2" double-bias binding or 4-2" strips, cut into 14" pieces for binding
A coordinating mug and goodies to add inside, such as hot cocoa, coffee, tea mixes, candies or cookies

Sew together the four squares using 1/4" seam and press

Cut two pieces of the white fabric at least 1" longer on each end. Sew and press open

Trim using a ruler. Repeat the other two sides and press

Your finished piece should look like this. Let's get twisting!

Here is the twister square

You can make your own using a clear 3 1/2" square. I have marked this cardboard just for reference. Important! Be sure to mark a "B" at the bottom left of the square

Time to start to mark the piece for cutting! See where the seams meet where the white trim meets the printed squares? This is where you will begin to mark the pieces

Place the crosshairs of the template on the seams and mark with a pen--yes, you can use an ink pen. You will cut on the markings later

Continue to mark across the top and then the remaining two rows

There is the completed marked piece--now it's time to cut them out on the lines!

Here is what you should end up with. Now, let's make some magic!

Remembering the print of the first square in the upper left hand corner, put the pices back together--just like a puzzle

Sew each row together into once piece

Cut two pieces of the coordinating trim, overlapping at least 1" on each side. Sew and press; square edges and do the same on the opposite sides. Press and square

With backing fabric right side down, layer batting and top--smooth and pin for quilting
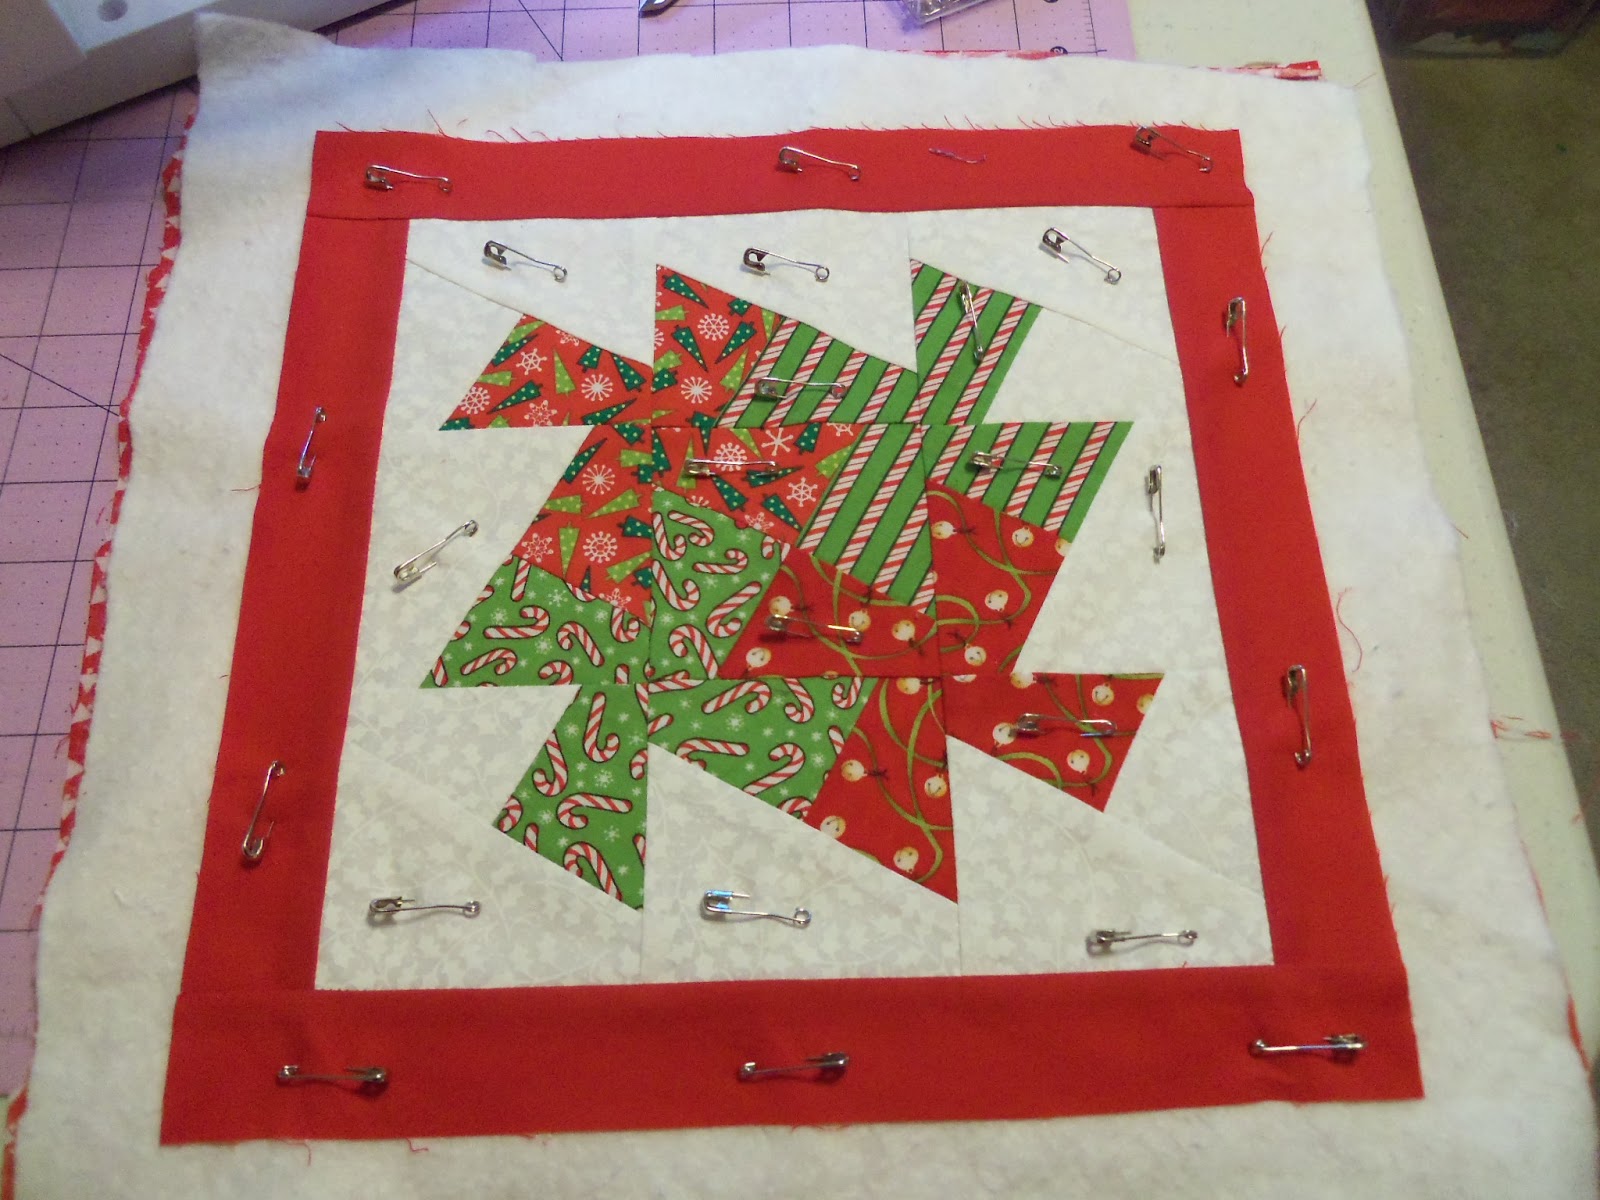
I machine quilted in the ditch on the red borders using red thread and the rest using clear thread. You can certainly use a stippling stitch if you wish

Usually I always bind any of the projects with bias binding, but this particular fabric is printed with the straight of grain looking on the bias. So, I just cut 2" strips and sewed them together with bias ends and hand sewed the binding down

Here is the finished mug rug

No comments:
Post a Comment