Area 3 Chapters

Area 3 Chapters in the beautiful state of Maine:


*Bog Hoot Quilters-Mechanic Falls area
*Chickadee Quilters-Bridgton Area
*Classic Quilters of Lewiston-Auburn Area
*Country Aire Quilters-Turner Area
*Country Square Quilters-North Jay/Wilton Area
*Cross Country Quilters-Bethel Area
*Grammy's Choice Quilters-Canton Area
*Ladies of the Lake Quilters-Peru/Rumford/Dixfield Area
*Lisbon Krazy Kwilters-Lisbon Area
*Pine Needle Quilters-Norway/South Paris Area
*Scraps and Patches Quilters-Poland Area
*Village Scrappers Quilters-Livermore Area


Showing posts with label gifts. Show all posts

Thursday, November 15, 2012

Mug Rug Tutorial

With only a few short weeks before Christmas, a quick and easy gift is a blessing to find. Need a little something for your child's teacher, a bus driver, hairdresser or favorite aunt?
 
Choose a colorful mug and add a matching rug to go with it!


What is a "mug rug?" It's a small placemat, around 11 1/2" square, to use for a mug and a small snack. You can make in holiday prints with another holiday background, such as Valentine's Day or Easter or even a print that will go with your decor.
 
Let's start!
 
You'll need four-5" squares
 
Two strips of 3 1/2" by width of fabric (WOF) of white-on-white (WOW) print
 
Two strips of 1 1/2" of a solid fabric WOF
 
13" square of cotton batting
 
14" square of backing fabric
 
About 48" of 2" double-bias binding or 4-2" strips, cut into 14" pieces for binding
 
A coordinating mug and goodies to add inside, such as hot cocoa, coffee, tea mixes, candies or cookies


Sew together the four squares using 1/4" seam and press
 
 
Cut two pieces of the white fabric at least 1" longer on each end. Sew and press open
 
 
Trim using a ruler. Repeat the other two sides and press
 
 
Your finished piece should look like this. Let's get twisting!
 
 
Here is the twister square
 
 
You can make your own using a clear 3 1/2" square. I have marked this cardboard just for reference. Important! Be sure to mark a "B" at the bottom left of the square


Time to start to mark the piece for cutting! See where the seams meet where the white trim meets the printed squares? This is where you will begin to mark the pieces
 
 
Place the crosshairs of the template on the seams and mark with a pen--yes, you can use an ink pen. You will cut on the markings later


Continue to mark across the top and then the remaining two rows


There is the completed marked piece--now it's time to cut them out on the lines!
 
 
Here is what you should end up with. Now, let's make some magic!
 
 
Remembering the print of the first square in the upper left hand corner, put the pices back together--just like a puzzle
 
 
Sew each row together into once piece
 
 
Cut two pieces of the coordinating trim, overlapping at least 1" on each side. Sew and press; square edges and do the same on the opposite sides. Press and square
 
 
With backing fabric right side down, layer batting and top--smooth and pin for quilting
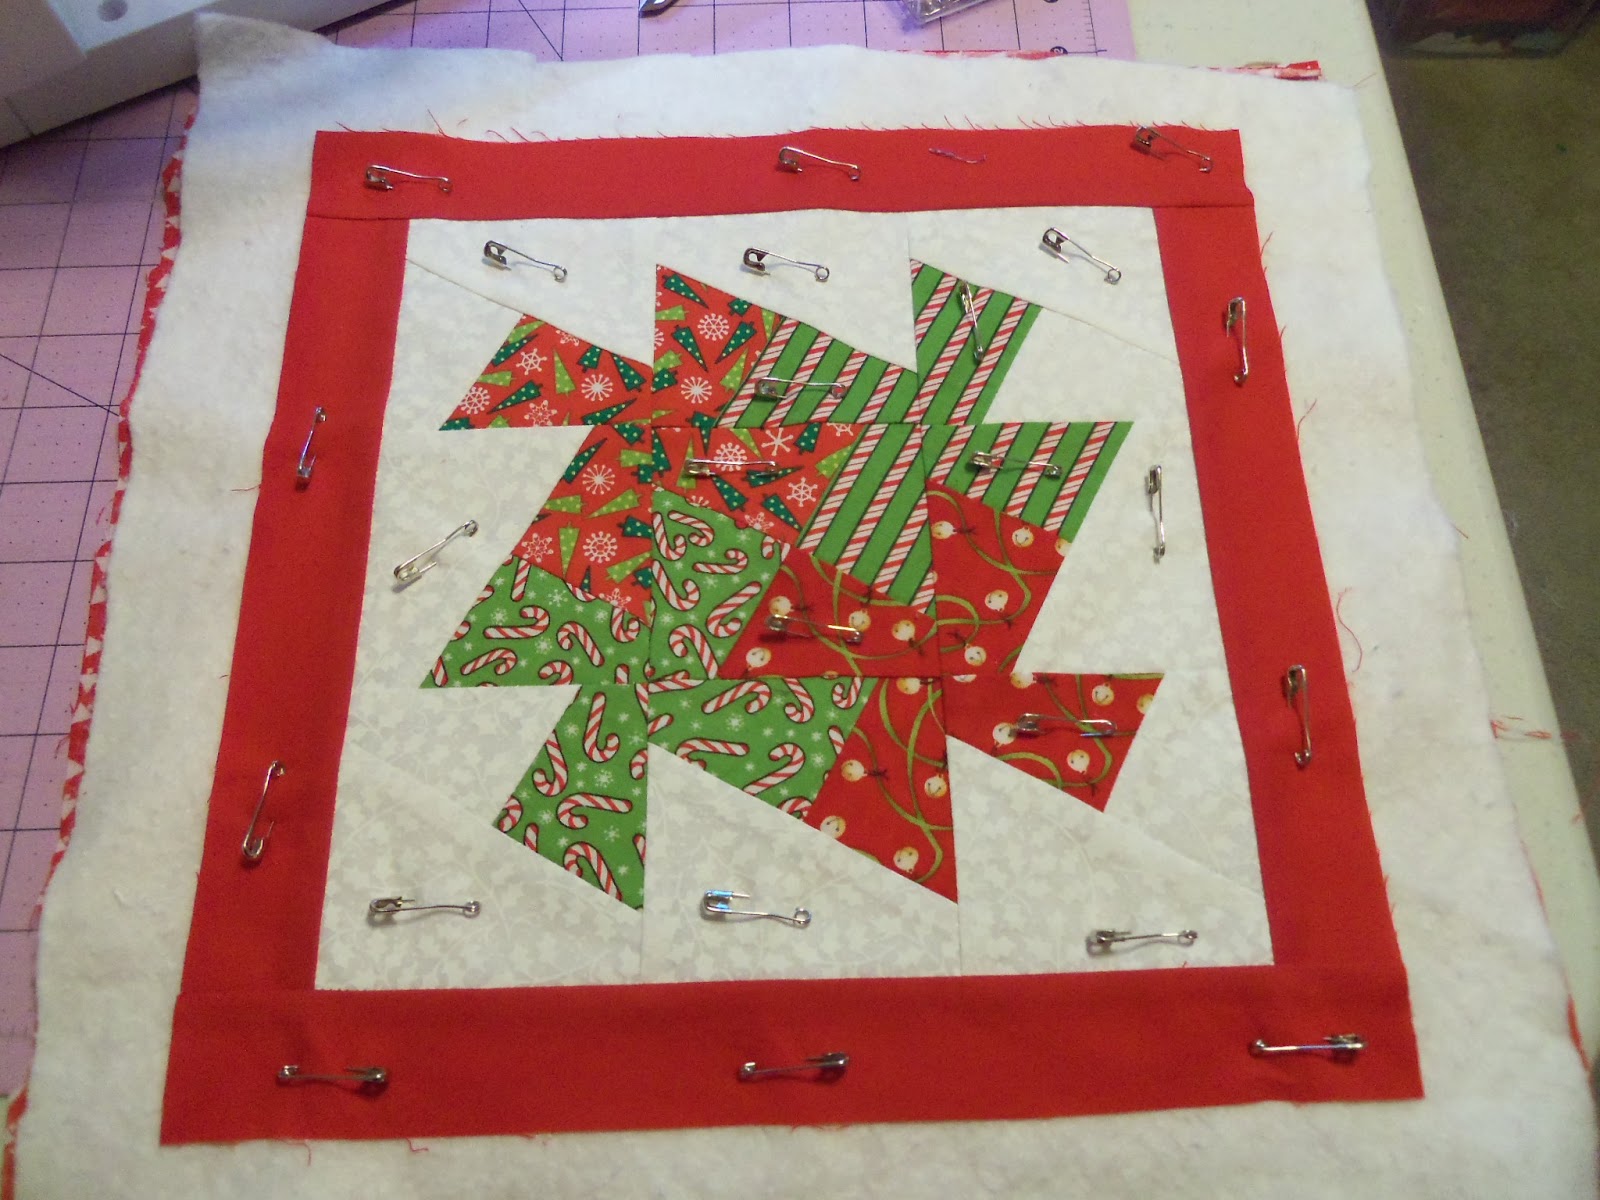
 
 
I machine quilted in the ditch on the red borders using red thread and the rest using clear thread. You can certainly use a stippling stitch if you wish
 
 
Usually I always bind any of the projects with bias binding, but this particular fabric is printed with the straight of grain looking on the bias. So, I just cut 2" strips and sewed them together with bias ends and hand sewed the binding down
 
 
Here is the finished mug rug


Saturday, July 7, 2012

Easy Crochet Necklace


Classic Quilter member Charlotte would like to share this pattern with you. Thanks, Charlotte!

Use ICE (also called ladder, trellis or railroad) yarn. Working off the ball and using a US size “L” (8mm) crochet hook, measure 10-12”, then start crocheting 50-60 chains. Measure 10-12” at the end of the last chain and cut off.

Make seven (7) more like the first one. Then, holding all eight (8) pieces together, make a knot close to the start chain and again at the other end.

Take all the end strands and pull them through a bead (a small steel crochet hook works well). Slide the bead down to the two knots and make a knot at the end, slide bead up to this knot.

Your necklace is complete!

Monday, June 25, 2012

Start Your Holiday Sewing!

Okay, you have SIX months before the holiday season. Only SIX months--yikes! Time to make a few gifts to have on hand. These wine totes are perfect--just add a bottle of your finest vino for the perfect hostess gift.

Wine Tote Tutorial

Tuesday, May 8, 2012

Craftster Straight Sided Triangular Cosmetic Bag Tutorial

Cosmetic Bag Tutorial
I always wondered how they inserted the zipper perfectly in the cosmetic bags I have purchased--now I know the secret! Nice gifts for the special ladies in your life!

Chicken Pincushion Tutorial by Quiltscapes

Chicken Pincushion

What a fun way to store your pins and needles! Make a whole flock of these to share with friends and family--and try filling with beans for the kids for bean bags.

Friday, March 16, 2012

Quilting blogs with great gift ideas

It is NEVER too early to get ready for the holidays! Here is a link to Geta's Quilting Studio and her fabric shopping bags.

Shopping bags


Quilted fabric bowl

Sunday, February 12, 2012

Thursday, December 1, 2011

Easy Holiday Snacks

 Today is December 1st and now your starting to panic about all the holiday gifts you need to make.

Here is a simple, but yummy treat even the kids can help with. The salty and sweet combination is divine!

Using small twist or waffle pretzels, place on plate and place a Hershey kiss (any flavor) on top of pretzel and microwave for 20 seconds. This should just soften them enough to place an M & M or pecan half on top. You might want to try one to see if you need to add or decrease cooking time due to your microwave's wattage.
 
Cool on a wire rack and store in an airtight container. If you layer these between sheets of wax paper and freeze, they will store nicely.

Tuesday, November 8, 2011

New Twister Projects-Christmas Tree and Jack O' Lantern

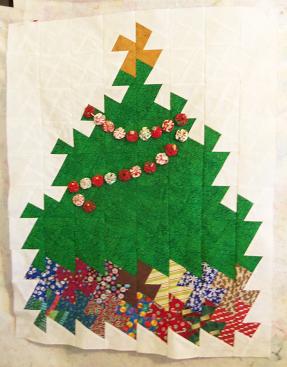
I think designing new patterns is just as much fun as making them. Here is a Christmas tree that I am going to add a small yo-yo garland and trim the presents under the tree. I'll add a red inner border and then a larger Christmas print border. This would be an excellent wall hanging for a friend or family member with limited space or in a nursing home to brighten their holidays!

Before

The Jack O' Lantern is just as easy to make! I'll add a curled green vine on the top of the pumpkin and add a black inner border and then a Halloween print larger border.
After


Before

After